In this article, we introduce how to generate a PDF file from data in kintone, save it in OPROARTS Drive, and distribute its URL by email
You are going to use the following D3Worker SERVICEs.
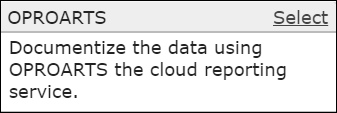
- OPROARTS: Generates a PDF file using CSV data received from kintone.
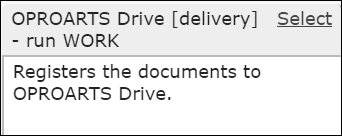
- OPROARTS Drive [delivery] - run WORK: Uploads a PDF file to OPROARTS Drive and run another WORK (this time, delivering the save destination URL by email).
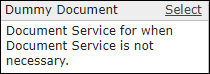
- Dummy Document: A DOCUMENT SERVICE that is used when sending an email including a save destination URL.
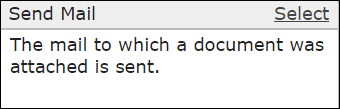
- Send Mail: Sends an email including a save destination URL of the PDF file.
D3Worker Settings
D3Worker settings can be divided into two steps:
1. A WORK to generate a PDF file and save to OPROARTS Drive
2. A WORK to distribute a save destination URL by email
Since WORK 2 is referred to from a SERVICE belonging to WORK 1, set up SERVICEs, ENVELOPE, and WORK used in the step 2.
Settings for email distribution of a save destination URL
SERVICE Settings
Select "Dummy Document" to create a SERVICE.
See this article for details.
Next, select "Send Mail" to create a SERVICE.
See this article for details.
ENVELOPE Settings
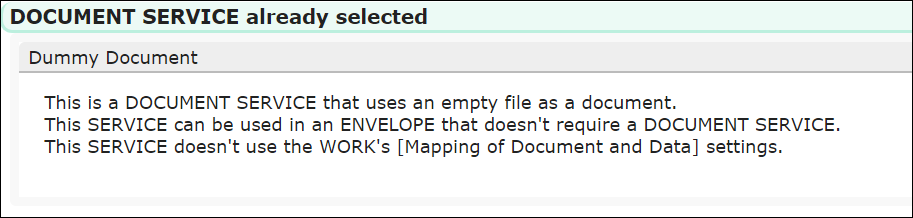
Select the SERVICE based on "Dummy Document" for DOCUMENT SERVICE.
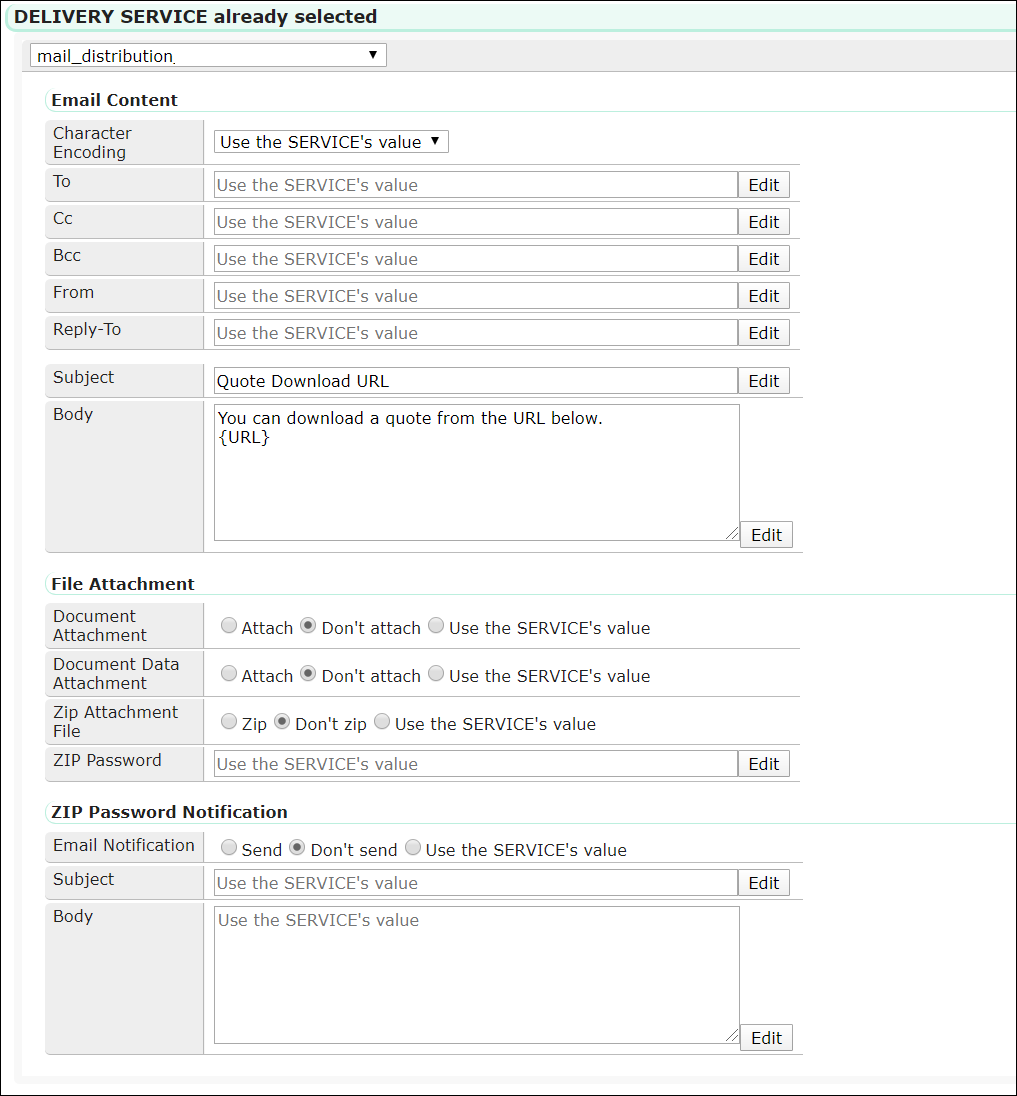
Select the SERVICE based on "Send Mail" for DELIVERY SERVICE.
Here, sentences including an ENVELOPE parameter "URL" (a save destination URL will replace this text) are set as a body.
WORK Settings
Data Source: Since this WORK receives the save destination URL of OPROARTS Drive, prepare a field for it. Let's name it "URL" for now.

ENVELOPE: Select the ENVELOPE you created, select "URL" for ENVELOPE Field, and select "ENVELOPE Field" for "Field to Be Activated". Then check "Use as ELSE".
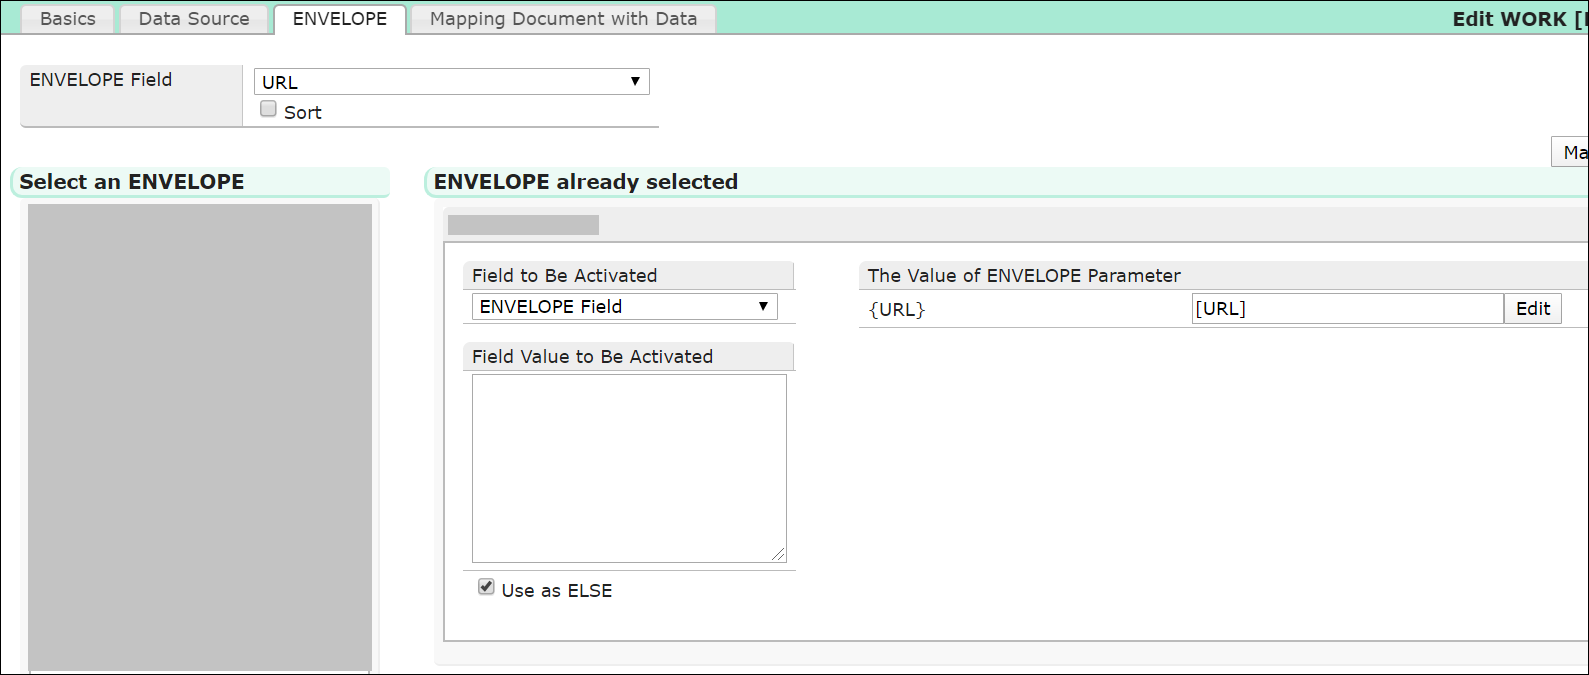
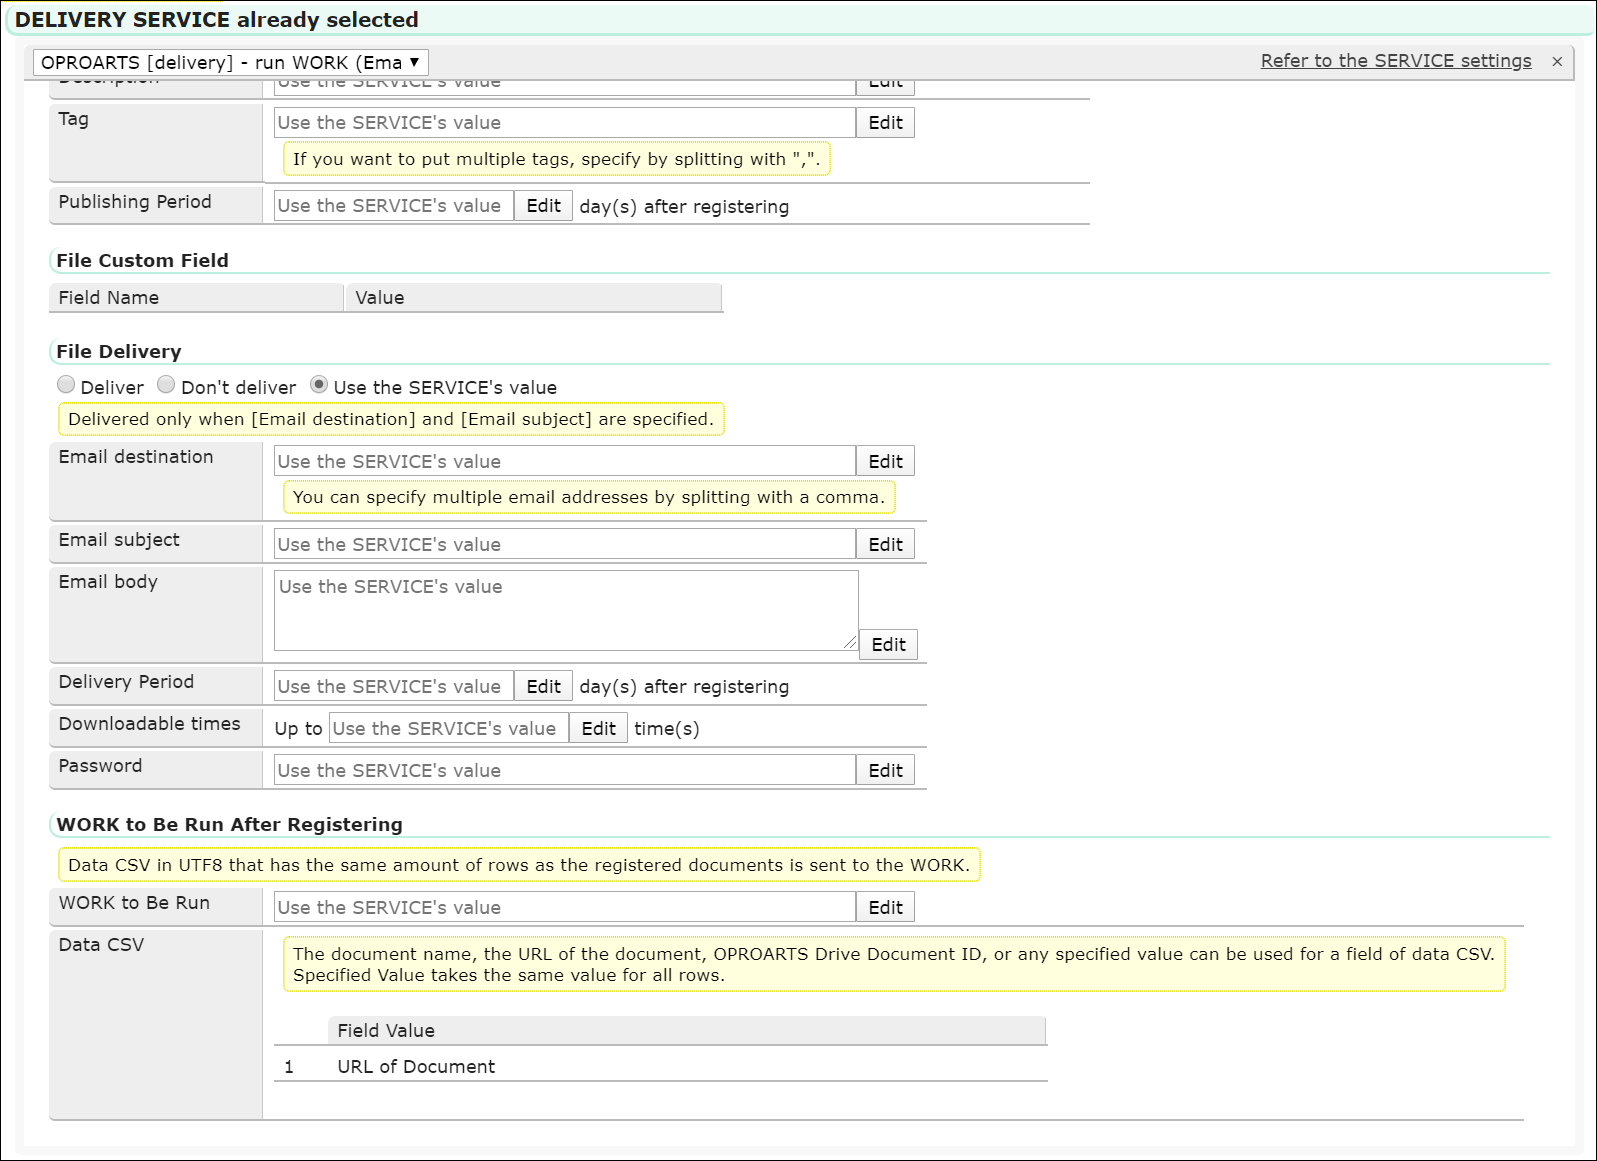
Mapping Document with Data: Since no document is generated in this WORK ("Dummy Document" SERVICE is used), leave all fields blank.
Settings for generating a PDF file and saving in OPROARTS Drive
SERVICE Settings
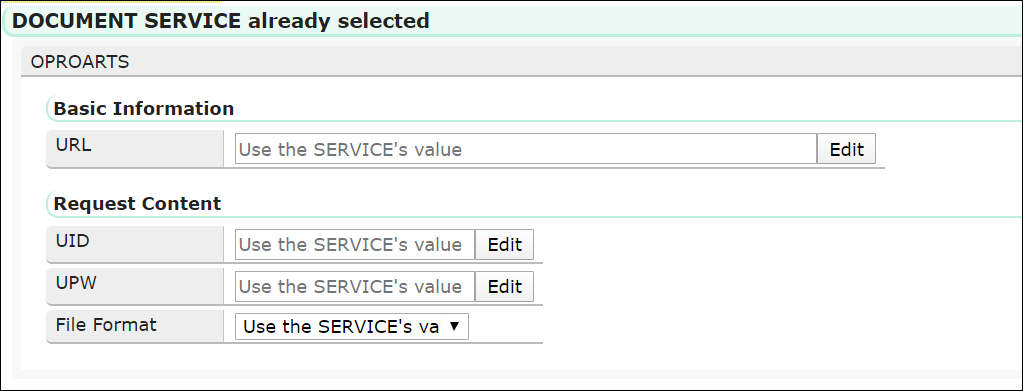
Select "OPROARTS" to create a SERVICE.
See this page for details.
Although ”OPROARTS (different account)" is used in the page, perform the same settings.
Next, select "OPROARTS Drive [delivery] - run WORK" to create a SERVICE.
See this page for details.
ENVELOPE Settings
Select the SERVICE based on "OPROARTS" for DOCUMENT SERVICE.
Select the SERVICE based on "OPROARTS Drive [delivery] - run WORK" for DELIVERY SERVICE.
WORK Settings
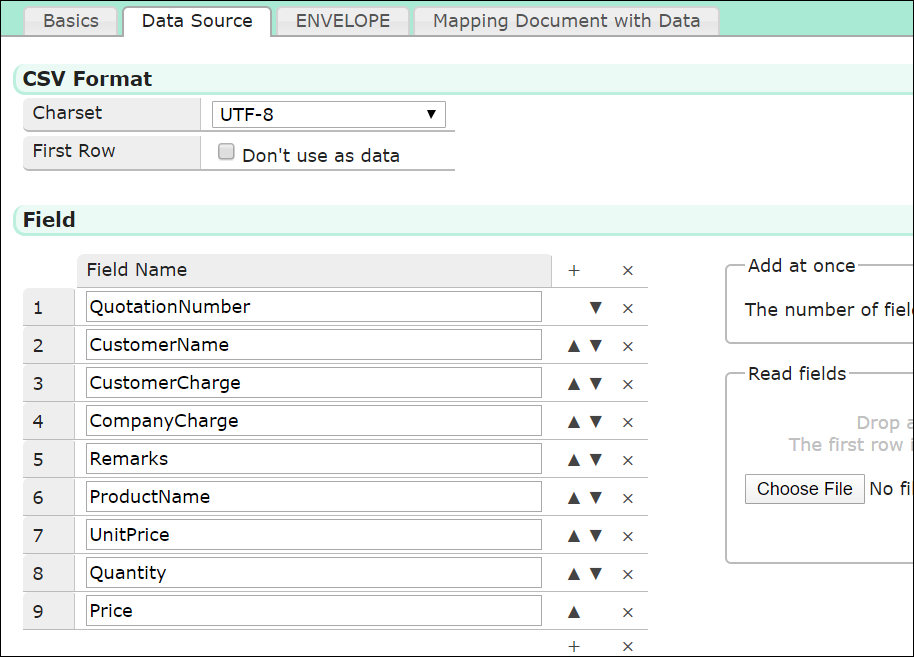
Data Source: Define CSV fields of data to be received from kintone.
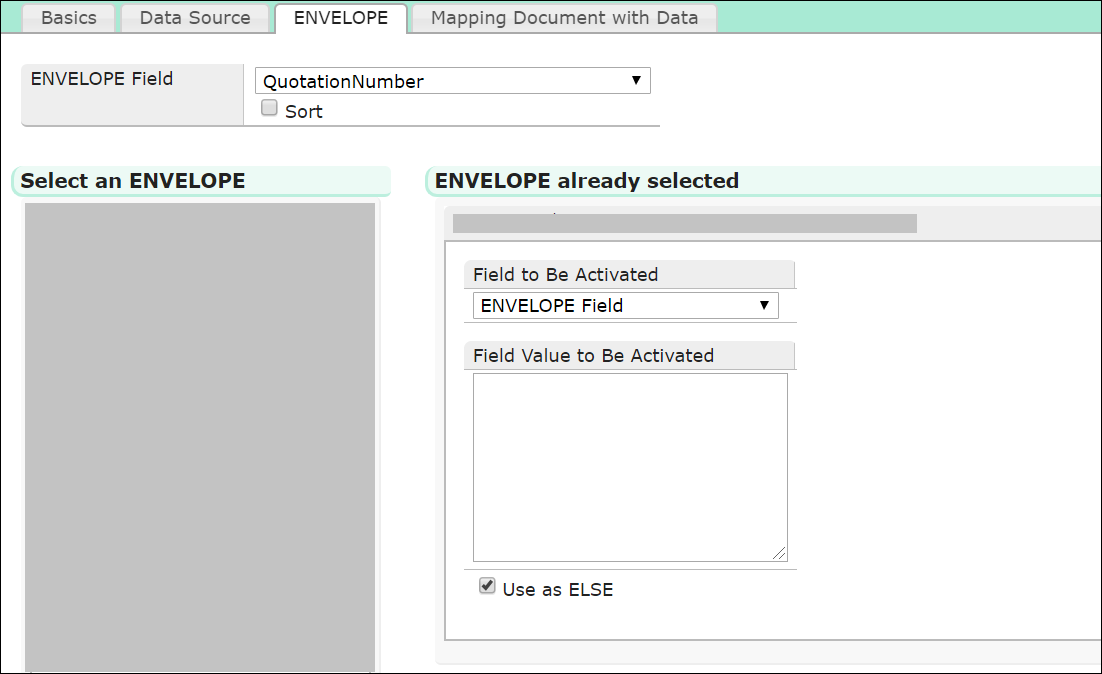
ENVELOPE: Select the ENVELOPE you created, select the data source field that identifies a form data unit (QuotationNumber) for ENVELOPE Field, and select "ENVELOPE Field" for "Field to Be Activated". Then check "Use as ELSE".
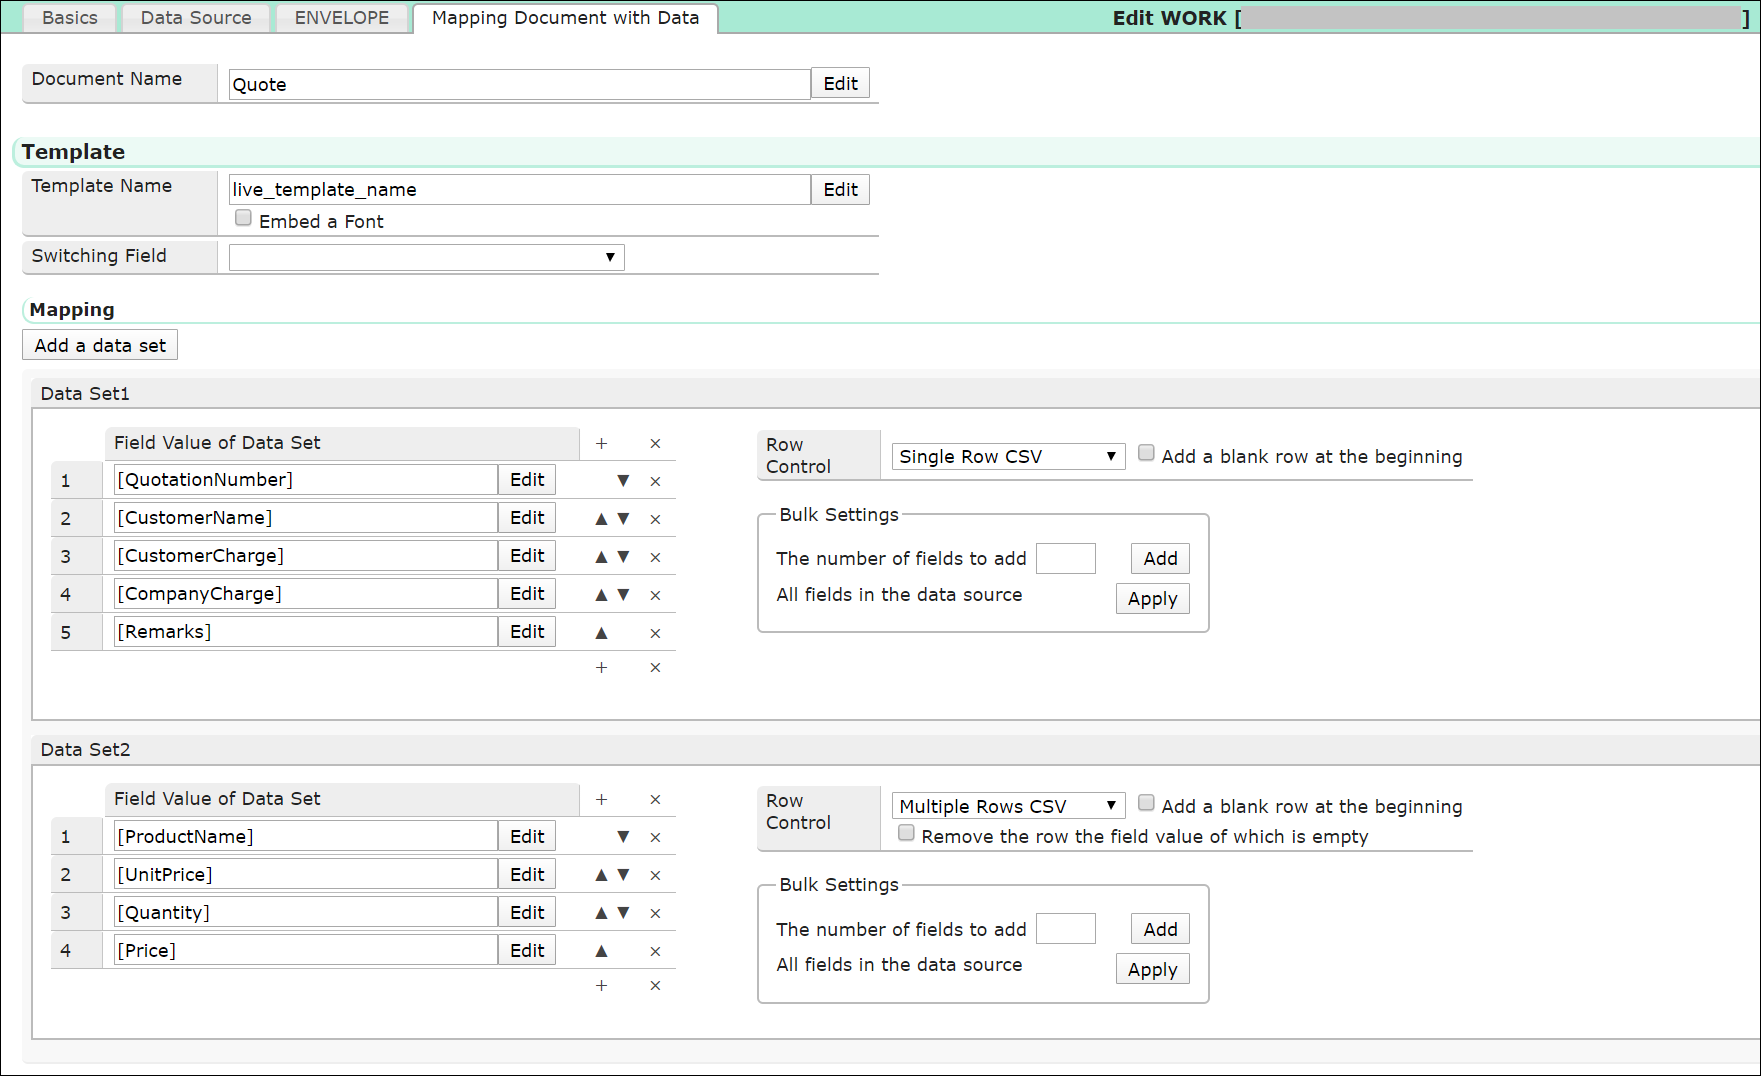
Mapping Document with Data: Map the data source fields with the CSV fields of the form template.
Enter the template name with a prefix "live_", like "live_{template name}".
kintone Settings
To run the work from kintone's record detail screen, perform settings in kintone.
Add an App and Plug-in
Download two ZIP files from this page and add an app/plug-in of "D3Worker Connector for kintone" to your kintone environment using those files.
Install the App
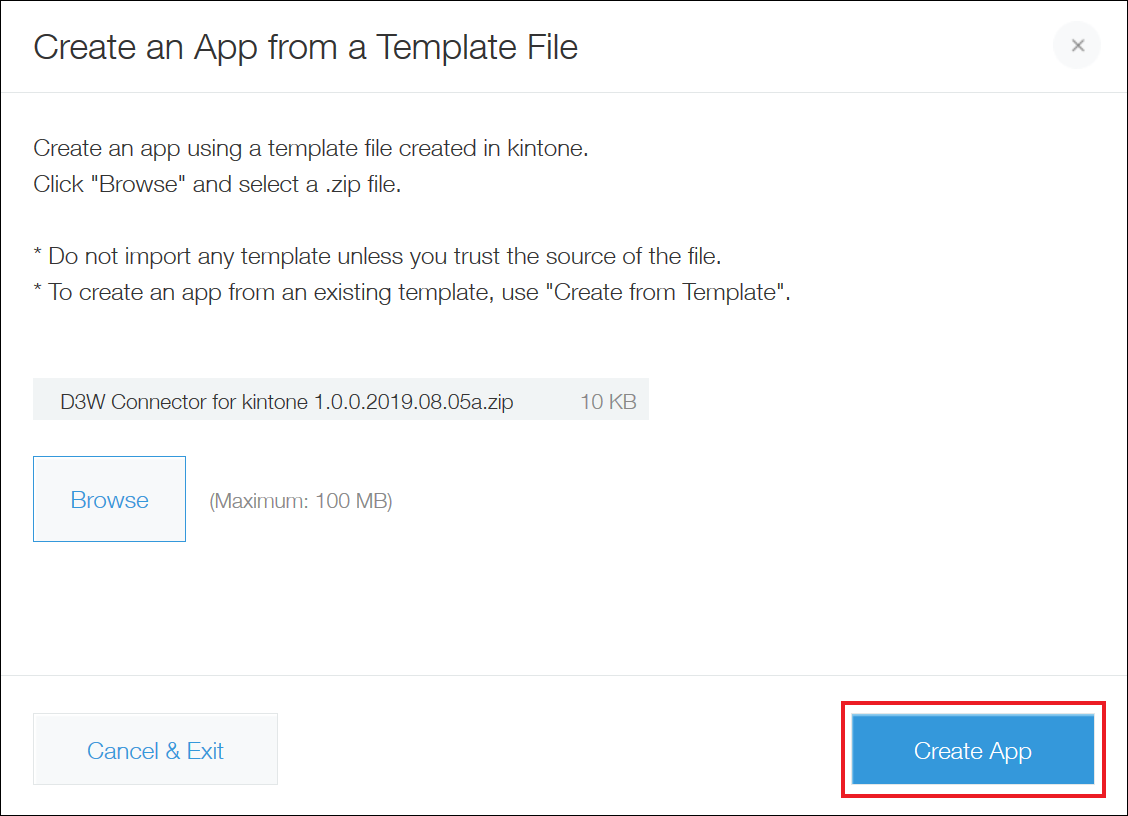
- In App Management screen, click Create App > Create from Template File and select "D3W Connector for kintone 1.0.0.2019.08.05.zip" in a pop-up screen "Create an App from a Template File", then click "Create App".
Install the Plug-in
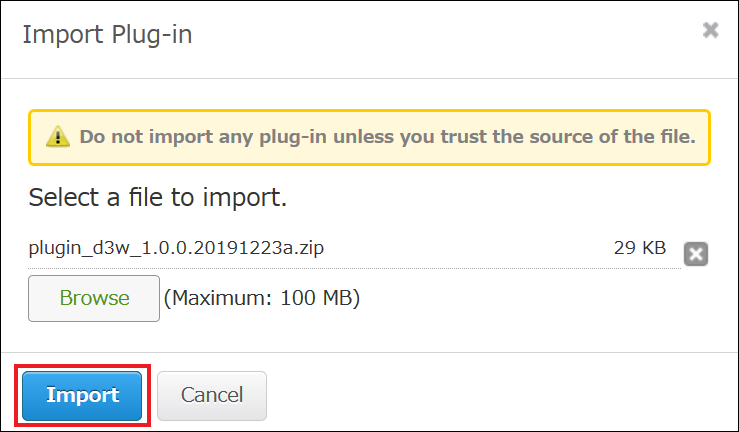
- Click kintone Administration > Plug-ins > Import and select "plugin_d3w_1.0.0.20191223a.zip", then click "Import".
App Settings
Open D3W Connector for kintone app and perform the following settings.
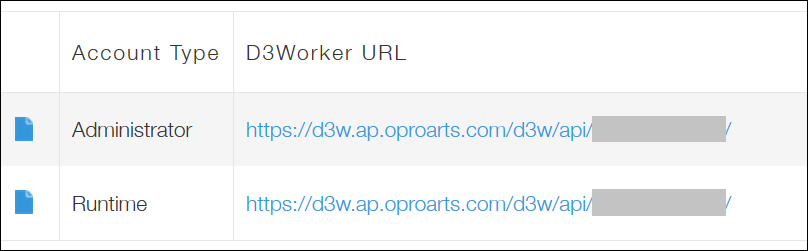
- For each account type of "Runtime" and "Administrator", create a record with the following settings.
D3Worker URL:https://d3w.ap.oproarts.com/d3w/api/xxxxxxx/
* xxxxxxx is a tenant name for each customer.
User: A user to run a WORK in D3Worker or to manage settings
UID, UPW: UID and UPW for D3Worker
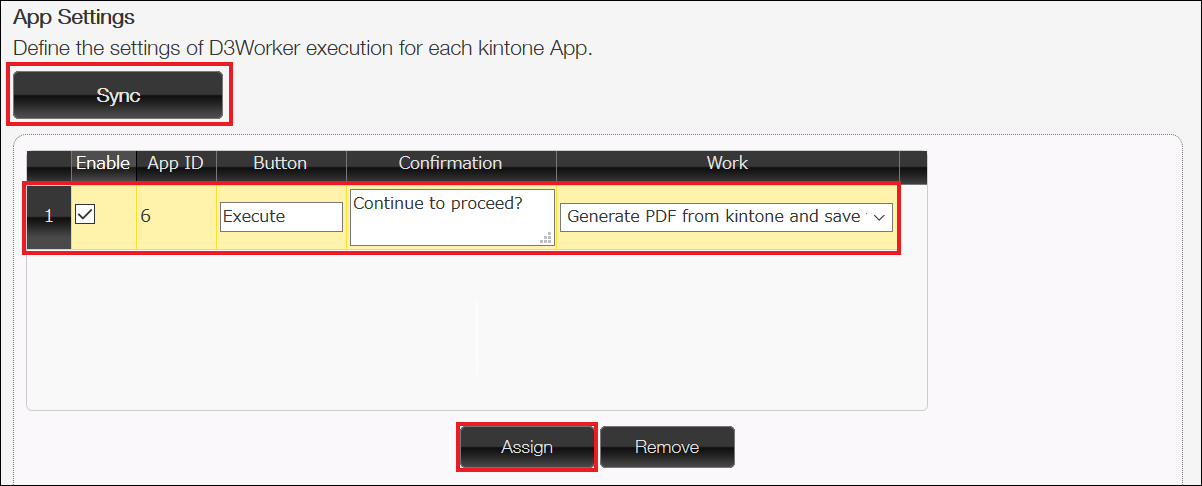
- Open a record screen of the record the account type of which is "Administrator", then click "Sync".
- Click "Assign" in App Settings and specify the ID of an app you want to call D3Worker from.
- A new row is added after you click "Add", so select the WORK to use.
* You need to do settings in D3Worker before you select the work in this step.
- Clicking "Mapping" in Mapping opens a pop up screen for mapping D3Worker data source fields with kintone app fields.
- Map D3Worker data source fields with kintone app fields.
In the image, each data source field corresponds to each kintone app field like "QuotationNumber" to kintone app's "QuotationNumber", "CustomerNameD" to kintone app's "CustomerName", etc...
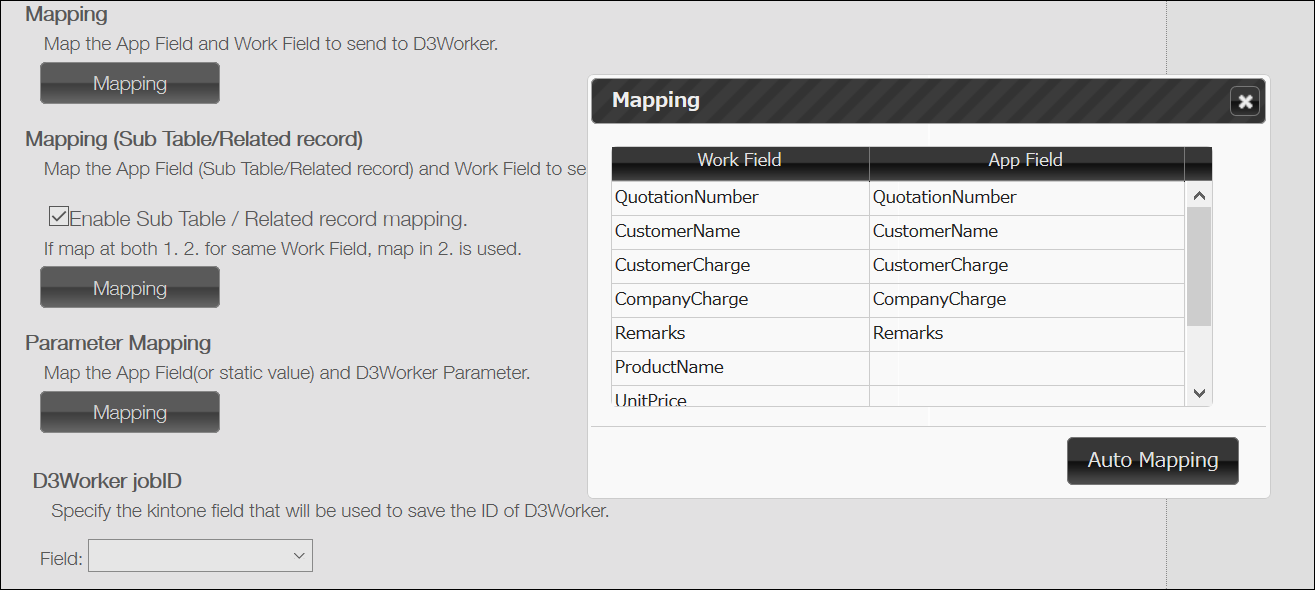
* When you use a sub table or related records for line items, check "" and configure in the same way. - Click "Save" button.
Plug-in Settings
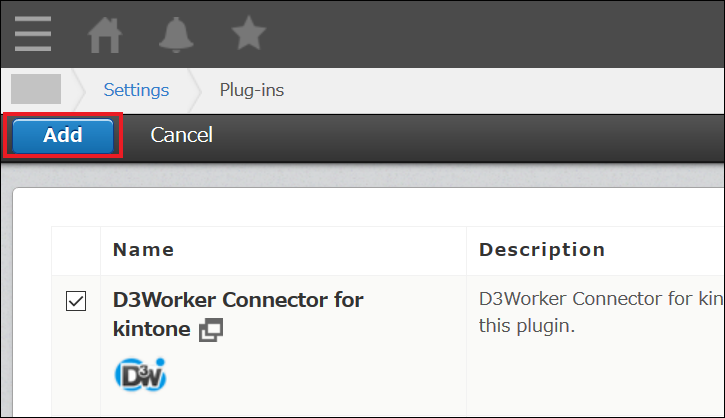
- Open settings screen for an app you want D3Worker to integrate with, then click Plug-ins > New. Then check D3Worker Connector for kintone and click "Add".
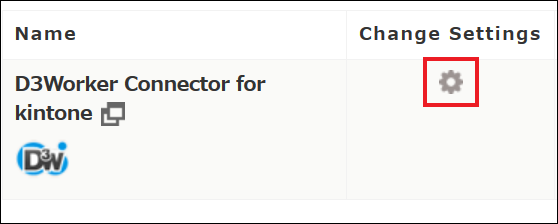
- Click a gear icon of D3Worker Connector for kintone.
- Select D3Worker Connector for kintone for which you configured in "Select OPROARTS Connector for kintone ".
- Click "Add" in "Button Placement Settings" and select the button you created in the previous chapter.
- Click "Save".
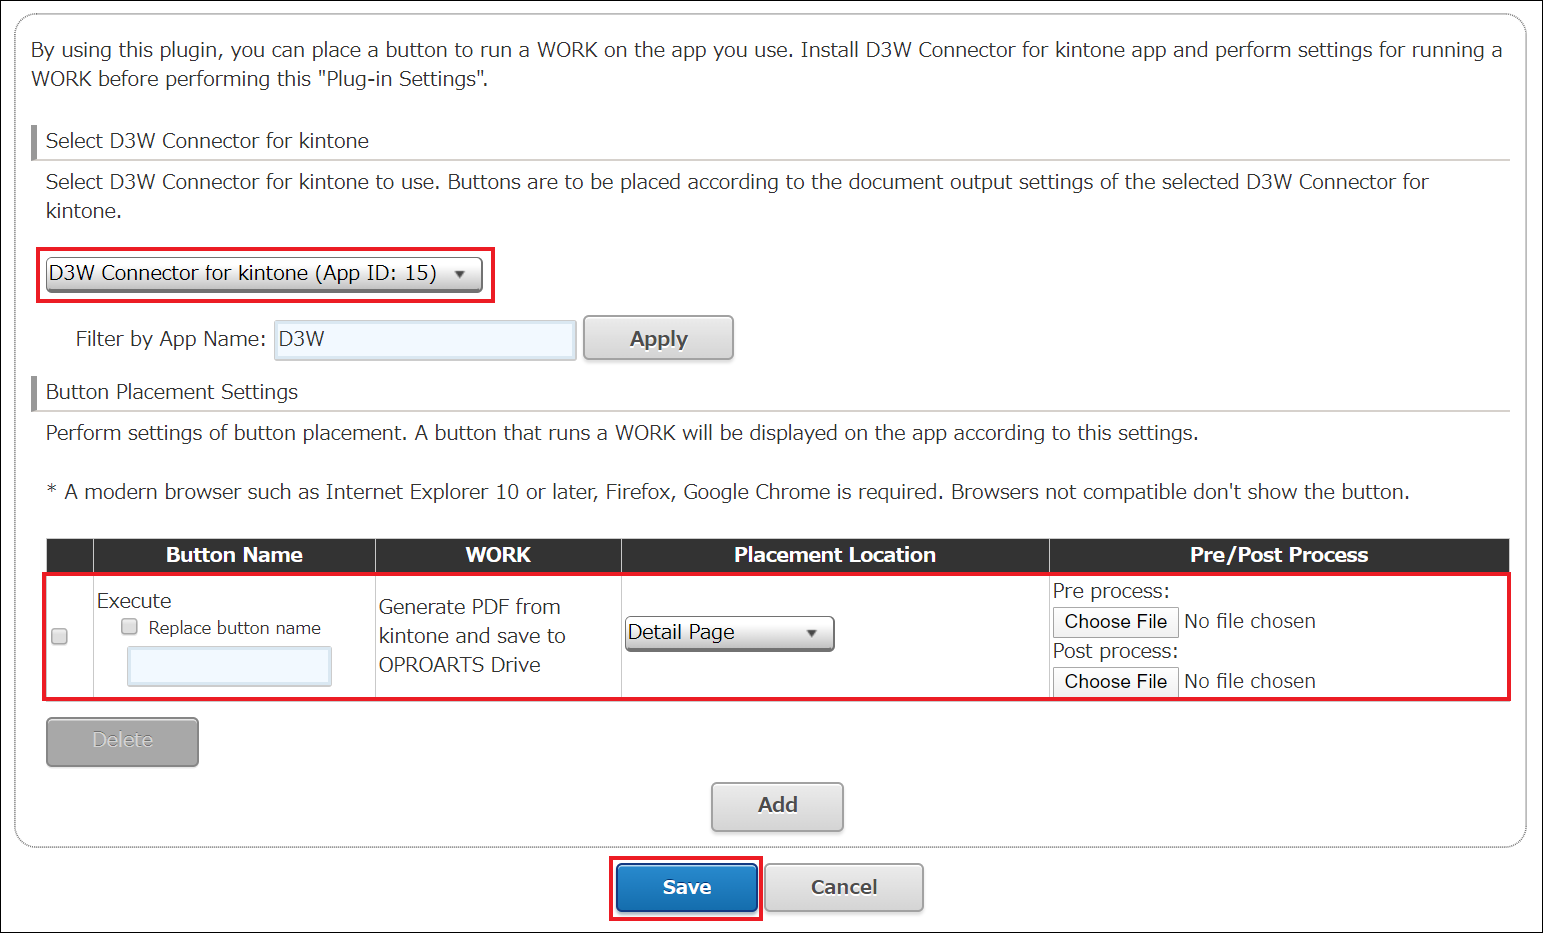
- Click "Update App" button in the app settings screen.

Actual Flow
After performing all settings above, click the button in the record detail screen.
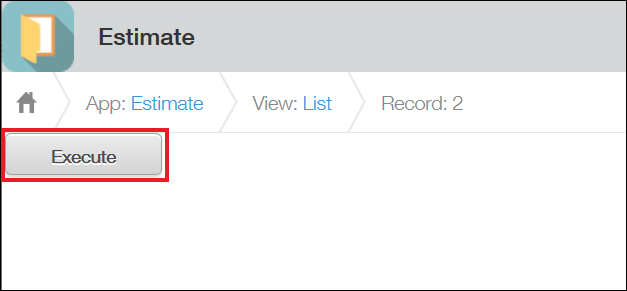
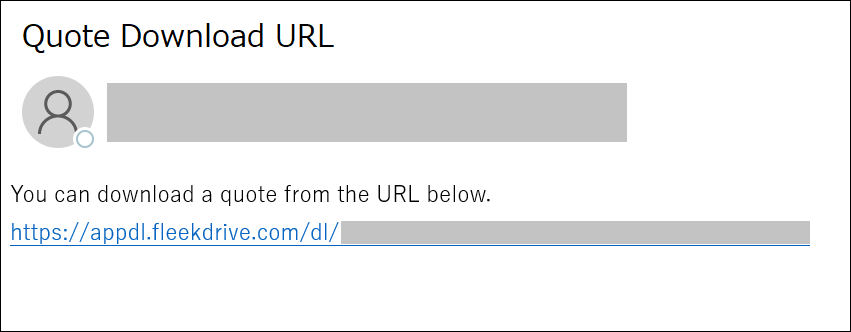
A PDF file is saved in OPROARTS Drive.

And a notification email is sent.
By automating process of generating a PDF file, uploading it to OPROARTS Drive and distributing the document's URL by email, it is expected that a huge amount of time is saved in trading work among companies.
We hope that this article help you integrate D3Worker with OPROARTS Drive.